Commodity groups
What Commodity groups are collections in which individual sales items, e.g. pasta, pizza, burgers, and beverages, are organized similarly to a category. Where Admin: Item management > Commodity groups > Add commodity group. |
Using commodity groups
Commodity groups are used in the POS and call center to group the input buttons for the sales items of a commodity group. A color can be assigned to each commodity group to make them easier to distinguish.
In the webshop and app, commodity groups are the main sections of item navigation:
If inventory management is used, consumable items, e.g. packaging, cleaning cloths, etc., can also be grouped into a commodity group for a better overview. However, these commodity groups should not be visible in the webshop or POS.
Commodity group overview
Commodity groups can be found under Admin: Item management > Commodity groups.
The commodity group list then opens. If no commodity groups have been created yet, the list will initially be empty.
After creating commodity groups under Admin: Item management > Commodity groups > Add commodity group the list may look like the example below.
Manage commodity groups
The commodity group list is structured in the same way as any other list in our system. The usual buttons are available for "Edit", "Deactivate/Activate" and "Delete".
Another button, "Add subgroup", is also available if a commodity group is to be subdivided further for the webshop and app, e.g. the commodity group "Beverages" can be further subdivided into "Alcoholic beverages" and "Non-alcoholic beverages".
In addition, depending on the settings selected when creating the commodity group, the incoming and outgoing order channels for which the commodity groups should be visible are displayed. Images assigned to the commodity group are also displayed.
In addition, a color can be assigned to the commodity group. This visually highlights the sales items of the
respective commodity group, both in the call center and in the
POS view.
Add commodity group
To create a new commodity group, click the dark green "Add commodity group" button - this opens the input form.
First, assign a name to the new commodity group. Next, the previously mentioned color can be assigned for easier identification.
Incoming and outgoing order channels
Under "Incoming order channels" and "Outgoing order channels"
you define where the commodity group should be displayed.
If the commodity group created is, for example, Pizza (i.e. a sales commodity group)
and it should be visible in the webshop, the "Webshop" button must be set to "Yes".
The display in apps, the POS, and the call center should also be set to "Yes" if the commodity group should be visible there.
Commodity groups can also be created for internal use only, e.g. for sorting items on the receipt, without being displayed in the POS.
Show only for logged-in webshop users
If customer login is available in the webshop and app, the option "Show only for logged-in webshop users" can be used as an effective marketing tool to encourage more users to register.
This allows you to create a commodity group that can only be seen when the visitor is logged in. For example, discounted or exclusive products that are otherwise unavailable in the webshop can be assigned to it.
For users who are not logged in, alternative text or an image can be added in the field below to encourage the visitor to log in.
Hide in the print sorting
The "Hide in the print sorting" option controls whether the sorting of commodity groups for invoices and kitchen tickets is taken into account in print sorting.
If the option "Hide in the print sorting" is enabled, the respective commodity group is no longer displayed in the defined sorting order of the printer settings.
This affects both the order of commodity groups on the invoice and the order of commodity groups on the kitchen ticket under Admin: Store management > Stores > Edit > Print. The settings "Sorting order of the commodity group on the invoice" and "Sorting order of the commodity group on the kitchen receipt" are available there.
Display in the webshop
The display option in the webshop determines how the items in a commodity group are displayed within the webshop.
Note: All commodity groups must use the same display option.
Note: All commodity groups must use the same display option.
Using "Hide" hides the commodity group in the webshop.
Image for the commodity group
At the end of the input form, an image can be uploaded for the commodity group. Depending on the application, this image is used in different places.
The standard size for commodity group images is: 2000 × 500 px (72 dpi)
Webshop
In the webshop, the image is displayed only on the commodity group overview page. This page can be set as the webshop start page in the settings under Admin: Webshop & App > Webshop settings > Start page > Webshop start page > Commodity group preview.
The image assigned to the commodity group can only be used on this commodity group overview page in the webshop.
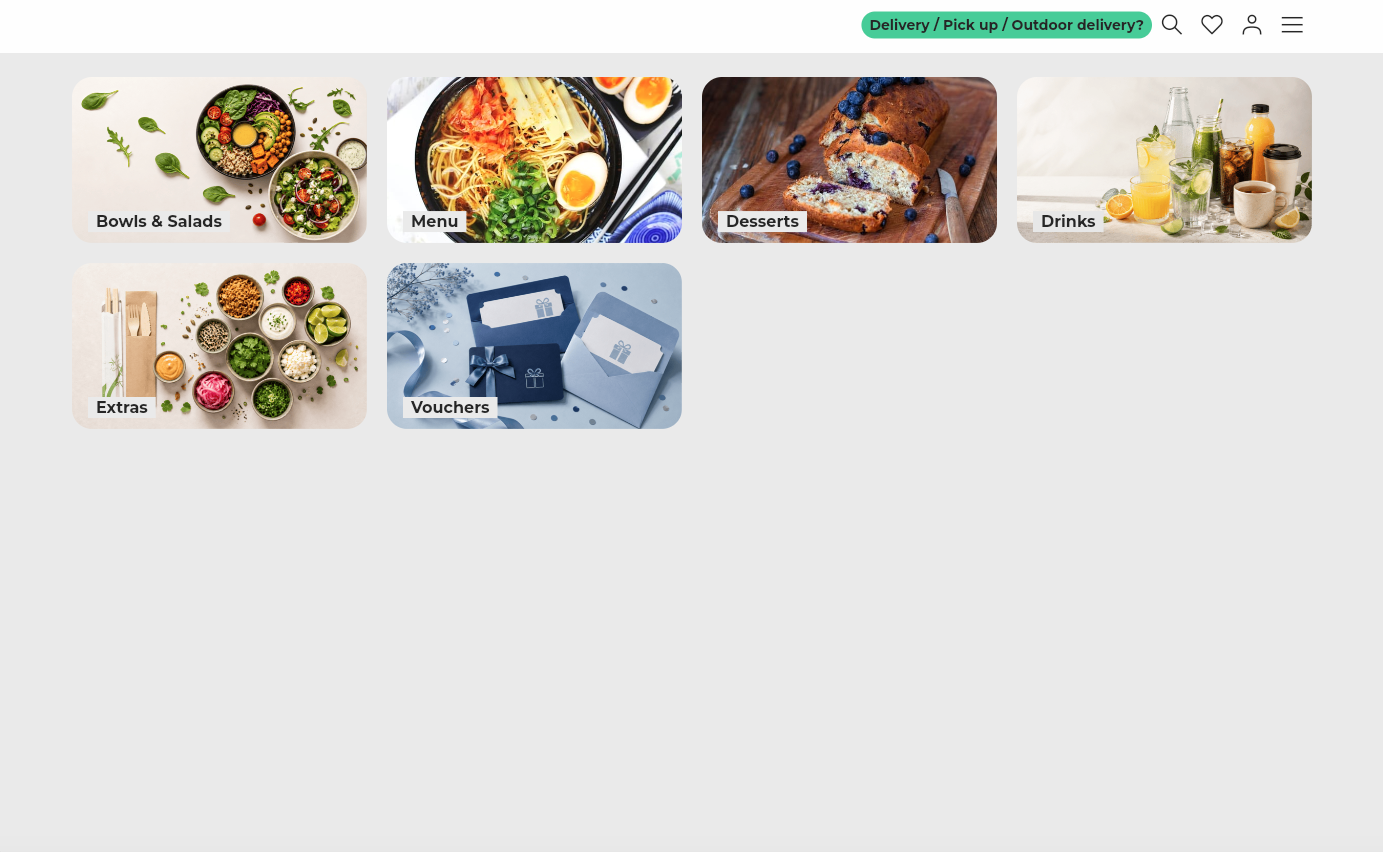
If an image is to be displayed below a commodity group in the webshop, the "Banner/recommendations" setting is used for this purpose.
More information on "Banners/recommendations" is available here: https://support.get-sides.de/portal/en/kb/articles/banners-recommendations.
App
The uploaded image can also be used as the commodity group image in the app.
The uploaded image can also be used as the commodity group image in the app.
POS
The assigned commodity group image can also be displayed in the POS. To do this, the "View commodity group images" option must be enabled in the local POS settings.
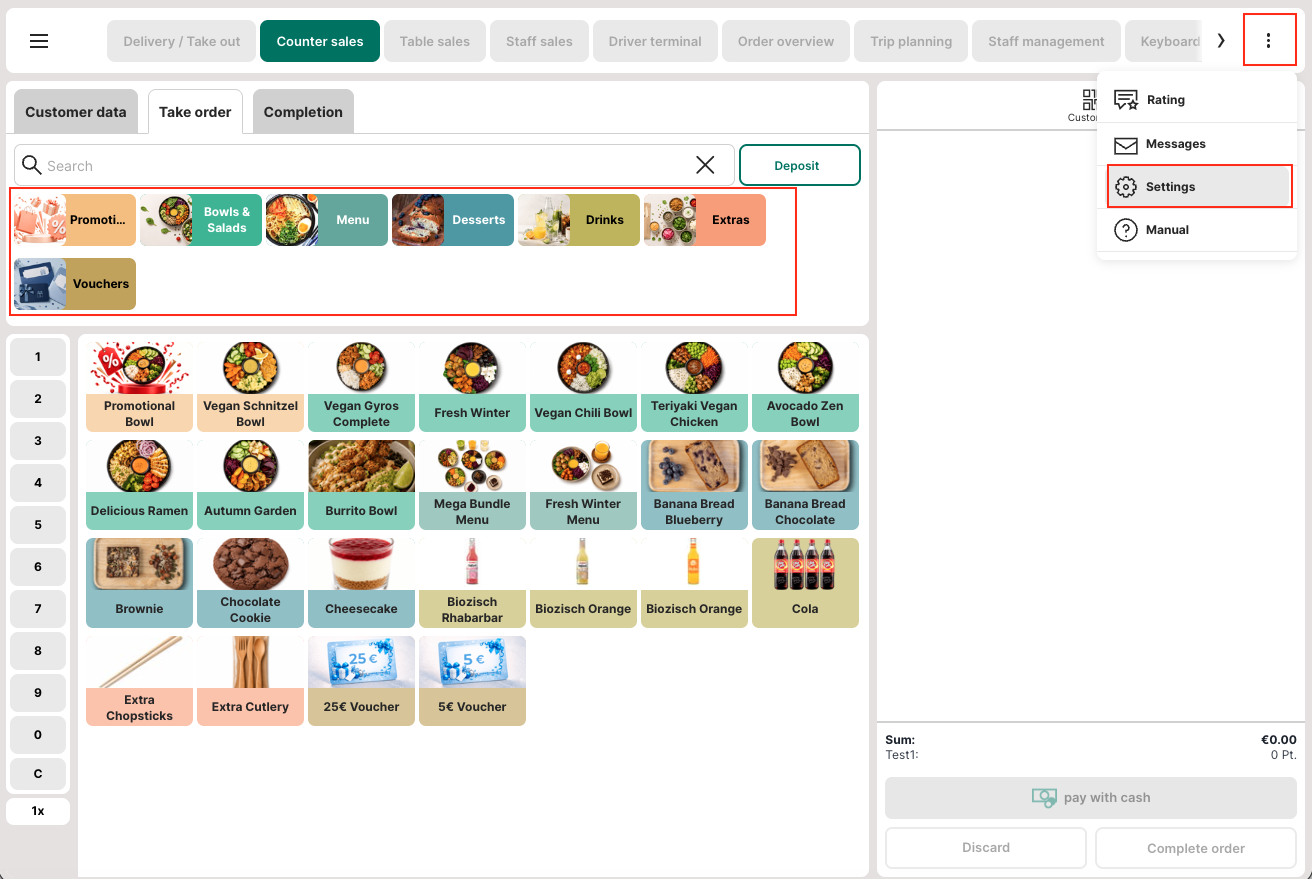
The assigned commodity group image can also be displayed in the POS. To do this, the "View commodity group images" option must be enabled in the local POS settings.