Workflow
For the kitchen manager the workflows for the products have to be defined. This is possible in the Admin --> via the Kitchen Manager category --> at the category subitem Workflow --> with the light green button Add Workflow on the top left.
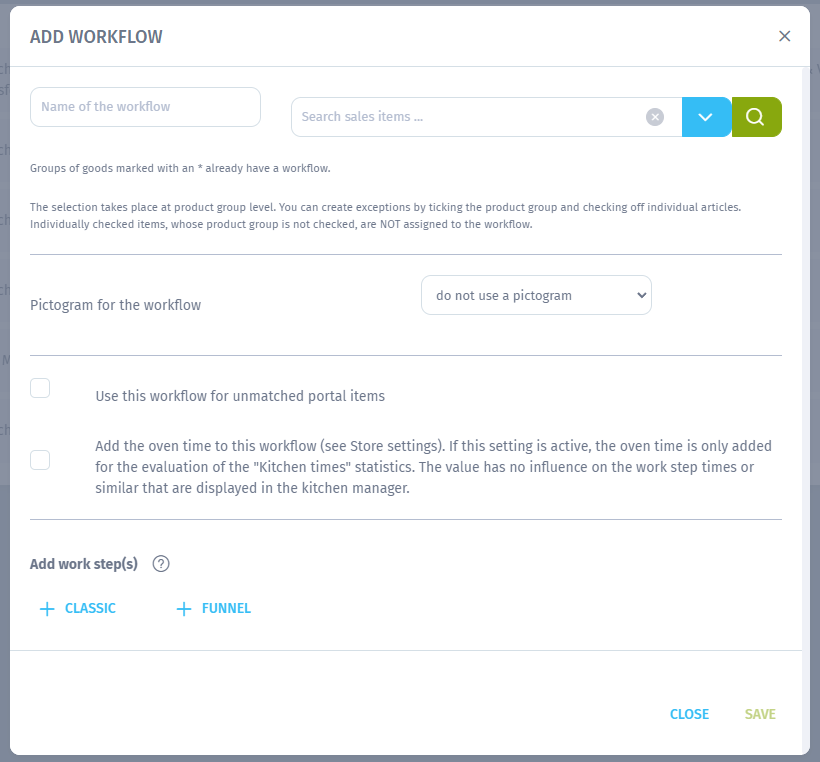
In our case study for the burgers:
- Uniquely name workflow and select products to get this workflow. The products can only be selected via their complete commodity group -- however, individual articles can be deactivated in this commodity group (activated products without an activated commodity group in which they are contained will not be accepted!)
- Select a pictogram for workflow (optional).
- Use workflow for unmatched portal items: enabled by default, but can be disabled.
The next step is to set the workflow steps for the items. For example, our burgers need to go once to the "Fryingstation (Bayreuth)" workstation to fry the patties and then further to the "Burgerstation" station for toppings. We, therefore, create these two work steps together with the required time.
Once all steps have been created in the correct order (work steps can also be moved by drag & drop), you finally click on the light green Save button at the bottom right.
In addition to the "CLASSIC" variant with exclusively linear work steps from the example above, there is also the "FUNNEL" variant in which several simultaneous work steps are created in the "first" work step and then an additional, final work step follows linearly (in this form, articles must first be completed in split form/separately on all work stations of work step 1[. X] before they continue to the next work station of work step 2 - they therefore appear simultaneously on all stations of the "upper section of the funnel", so to speak, and only after they have been completed on these stations they appear on the station of the "lower section of the funnel").
Explanations for all variants can also be found in the Admin in the modal that appears after clicking on the "Question mark symbol" button to the right of the "Add work step(s)" setting name.
After creating the workstations and work steps, you can still adjust them as often as you like using the gray "pencil icon" buttons Edit. If you just want to view it, click on the corresponding button as well, and then just click on the light blue Close button at the bottom left.
Related Articles
Version 1.2.217 - 20.09.2022
Archived release entry — 20 September 2022 Version 1.2.217 - New features and bug fixes New features: ADMIN+Webshops: In the Admin --> in the category "Store" --> at the category subitem "Global store settings" --> at the tab "Other settings" --> at ...Version 1.2.219 - 25.09.2022
Archived release entry — 25 September 2022 Version 1.2.219 - New features, changes and bug fixes New features: ADMIN In the Admin --> in the category "Store" --> at the category sub-item "Delivery Portal Accounts" after selecting a store via the ...Version 1.2.155.3 - 05.06.2021
Archived release entry — 05 June 2021 Version 1.2.155.2 - Kitchen manager new features/changes ADMIN Kitchen Manager-Admin-New feature: Sequence labeling for the work steps is now available in the Admin + Changes/Bug fixes: 1. you can now save work ...Version 1.2.97 - 12.02.2020
Archived release entry — 12 February 2020 Version 1.2.97 - New Functions for Statistics and Kitchen Monitor New Statistics: Store totals added Orders/tour added Wording changed Store comparison mechanism improved Fix: Item total line was not ...Version 1.2.185 - 06.02.2022
Archived release entry — 06 February 2022 Version 1.2.185 - New features, changes and bug fixes ADMIN Change: In the Admin --> in the category "Users" --> at the category sub-item "User Groups", users can now no longer create, edit, de-/activate or ...